Beginner’s Guide to Using CocoaPods with React Native
A long but smooth tour at integrating a CocoaPod with React Native

As developers we are excited by the promise of rapid, configurable, and free libraries that get results for our applications.
CocoaPods are a powerful resource that seasoned developers love to use. Succinctly it’s a package manager for iOS 3rd party code. Over 10,000 libraries reside at your fingertips for development and new and inspiring features roll in each day. Spend a few hours just admiring the gallery of functionality with CocoaControls.com. I often do.
What We’ll Be Making
I’m a fan of the JTSImageViewController pod for interactive image previews. Pan, zoom, flick and more right at your fingertips! Let’s add this to a React Native project.

This is what we’ll be accomplishing in following steps:
- Adding CocoaPods — The basics of how to add pods. Skip this if you know it.
- Create a Bridge to Native — Adding code inside Xcode that can be called from React Native JavaScript.
- Call Our Native Code —Verifying that we can actually run the code we just added.
- Utilize Pod Code — Making this whole thing something useful by calling the functionality in a pod.
Adding CocoaPods
If you’ve never added CocoaPods to a project, it might seem somewhat daunting at first glance. Rest assured that the process is only a passing pain for first-timers.
Ruby
The CocoaPods manager is built and supported by Ruby. So firstly, you need to have Ruby. OS X ships with a version of Ruby installed by default, but they require sudo to install gems. *BLECH!* If you plan on NEVER touching Ruby again, I guess this is okay.
Use sudo if you must, but preferably install with:
$ gem install cocoapodsPodfile
If you’re familiar with most package management systems, the Podfile is simple. It’s merely a list of external resources to be gathered and inserted into your project.
We start by moving into the iOS folder of our RN project, and typing pod init, which generates the template Podfile.
$ cd ios
$ pod init
Now you can edit your Podfile to add what pods you’d like. I’ll be adding the Image Preview pod. My Podfile looks like so:
# Uncomment this line to define a global platform for your project
platform :ios, '8.0'
# Uncomment this line if you’re using Swift
# use_frameworks!target "RNImagePreview" do
 pod 'JTSImageViewController'
end
at this point you can install with:
$ pod installPro Tip — Sometimes pod install just hangs forever: the following is a fix.
$ pod repo remove master
$ pod setup
$ pod install
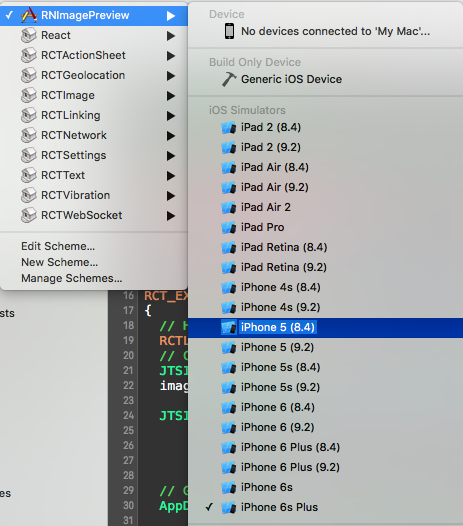
Now, you’ll open RNImagePreview.xcworkspace instead of xcodeproj for your project from here forward. Try to add pods early in a project, so you’re not reinventing habits for your team. ALSO, be sure you have the correct schemas selected.
Create a Bridge to Native

Your workspace will contain your Xcode project with access to your pods.
There are lots of great ways to connect RN with native code, but for today we’ll be taking a very minimalistic approach. This will help most burgeoning React Native developers identify the entry points.
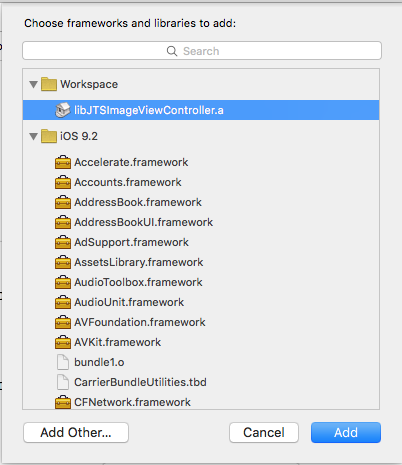
Lastly, don’t forget to link to your pod. Under Linked Frameworks and Libraries, be sure to add your pod’s .a file (static library).
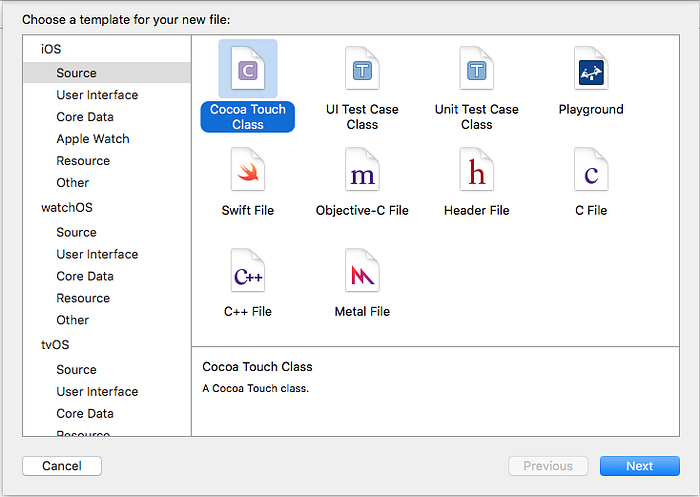
A Place for Native Code
Create a new class for our native code. I named mine JTSImagePreview.

Now in the generated JTSImagePreview files, open the header file (the .h extension) and add the RCTBridge.h reference and include RCTBridgeModule on your NSObject, like so:
#import "RCTBridge.h"
@interface JTSImagePreview : NSObject <RCTBridgeModule>
What’s going on in the above code?
The import should be self documenting, and the addition of <RCTBridgeModule> means that the class conforms to the RCTBridgeModule protocol.
You can then modify your JTSImagePreview.m file to look like this:
#import "JTSImagePreview.h"
#import "RCTLog.h"
#import <JTSImageViewController.h>@implementation JTSImagePreviewRCT_EXPORT_MODULE();RCT_EXPORT_METHOD(showImage)
{
// Here's our method's code
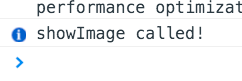
RCTLogInfo(@"showImage called!");
}@end
What’s going on in the above code?
The imports are pretty self explanatory. Our normal header, React logger, and our Pod. Next we call RCT_EXPORT_MODULE(); which exposes this module to react via a compile time macro. And finally, we use RCT_EXPORT_METHOD, which provides a method to our javascript, resulting in a simple log.
Call Our Native Code
Let’s call this showImage method from our JavaScript. I’ve added a call to the base component’s mount event.
UPDATE: The following screenshot is pre-0.29, we no-longer get NativeModules from React, we should get it from `react-native`, which has been separated out 0.29+. See repo or code at the bottom of this blog article for latest.

Run the app, and let’s check the debugging console…
Utilize Pod Code
Excitement overflowing, let’s use our pod! First thing we’ll do is add a parameter to our Obj-C, so we can know what url to show.

After examining the example pod code, we can see what code our method needs. We need to create JTSImageInfo with the needed URL. This is easy enough for the resulting code:
// Initialize imageInfo
JTSImageInfo *imageInfo = [[JTSImageInfo alloc] init];
// Set the URL
imageInfo.imageURL = [NSURL URLWithString:url];
We then create the JTSImageViewController with the needed info:
JTSImageViewController *imageViewer = [[JTSImageViewController alloc] initWithImageInfo:imageInfo
       mode:JTSImageViewControllerMode_Image
       backgroundStyle:JTSImageViewControllerBackgroundOption_None];
Looks great, we’re almost there! There’s just one more catch. We need to present the view controller from something. Our React Native Obj-C needs to know from what. To accomplish this, we can ask for the rootViewController from AppDelegate:
// Get root to show from AppDelegate
AppDelegate *delegate = (AppDelegate *)[[UIApplication sharedApplication] delegate]; UIViewController* showingController = (UIViewController*)delegate.window.rootViewController
This will work great as long as our project is 100% React Native. If you have a native Navigator or native Tabs, you’ll need to implement if-block solution provided in the example application (linked at the end, but not really in the scope of this article).
Now we can call showFromViewController in an async thread, and use our pod! The full .m file looks like this:
If you try to show from the main thread, you’ll get a very angry error. So you can see on line 32 above we use the the dispatch_async to solve this. Don’t be afraid if this seems alien to you. This is just one of those things you’ll see/need in Objective-C.
Now that our Objective-C is ready, let’s add our URL parameter to our JavaScript and voila! It will load the image with progress, and then give a fun image preview:
// BEFORE React Native 0.29
//React.NativeModules.JTSImagePreview.showImage('http://i.imgur.com/sKh7Z6R.png')// As of latest RN import differently
import { NativeModules } from 'react-native'
NativeModules.JTSImagePreview.showImage('http://i.imgur.com/sKh7Z6R.png')
If you have any questions, please see the full source code provided here: https://github.com/GantMan/RNImagePreview/, or contact me!
Special Thanks:
I couldn’t have figured this out without 🎶 a little help from my friends 🎶 Mark Rickert and Steve Kellock who speak Objective-C more fluently than I 😃
About Gant Laborde
Gant is Technical Lead at Infinite Red, published author, public speaker, and mad-scientist in training. If you’re looking to discuss nerdy tech, he’s all ears. View half-witty, half-groan technical tweets with @GantLaborde on twitter. Follow for free kittens! (kittens not included)