Getting Started with React Native Development on Windows

Update: Our free Installing React Native on Windows 10 course is now available with more up-to-date instructions. You can still follow the original guide below, but some things have gone out of date since I originally wrote it in 2016.
As a software engineer at Infinite Red, I have been privileged to work on several React Native projects over the last month. Under the tutelage of Steve Kellock, Gant Laborde, and Mark Rickert, I was shocked at how quickly I was able to ramp up on this new technology. Normally a new technology takes me several months to get to a point where I can feel productive on my own, but with React Native it only took a few days, so huge kudos to them for setting up outstanding projects and the engineers at Facebook for creating such an awesome framework.
With a couple of recent announcements, namely Bash for Windows and React Native on the Universal Windows Platform, I began to wonder if React Native development on Windows might already be possible.
Spoiler alert: it is!
You may have noticed that while Facebook has detailed instructions for getting started with React Native development on OS X, their instructions for getting started on Windows were a little lacking. Here are the steps I went through to get React Native running.
Note: my computer is running a Windows Insider build that already has the Bash for Windows support mentioned above. If you are unable to wait until the Bash for Windows feature is released to the public or upgrade your Windows installation to an Insider build, your next best bet is to try a tool that includes Bash, like Git for Windows.
Step 1: Prerequisites & Prep Work
- Download and install JDK (v7 or newer)
- Download and install Node
- Download and install Android Studio
- Create an environment variable with the Java SDK path: Windows → Search → System → Advanced System Settings → Environment variables → New
JAVA_HOME: C:\path\to\JavaSDK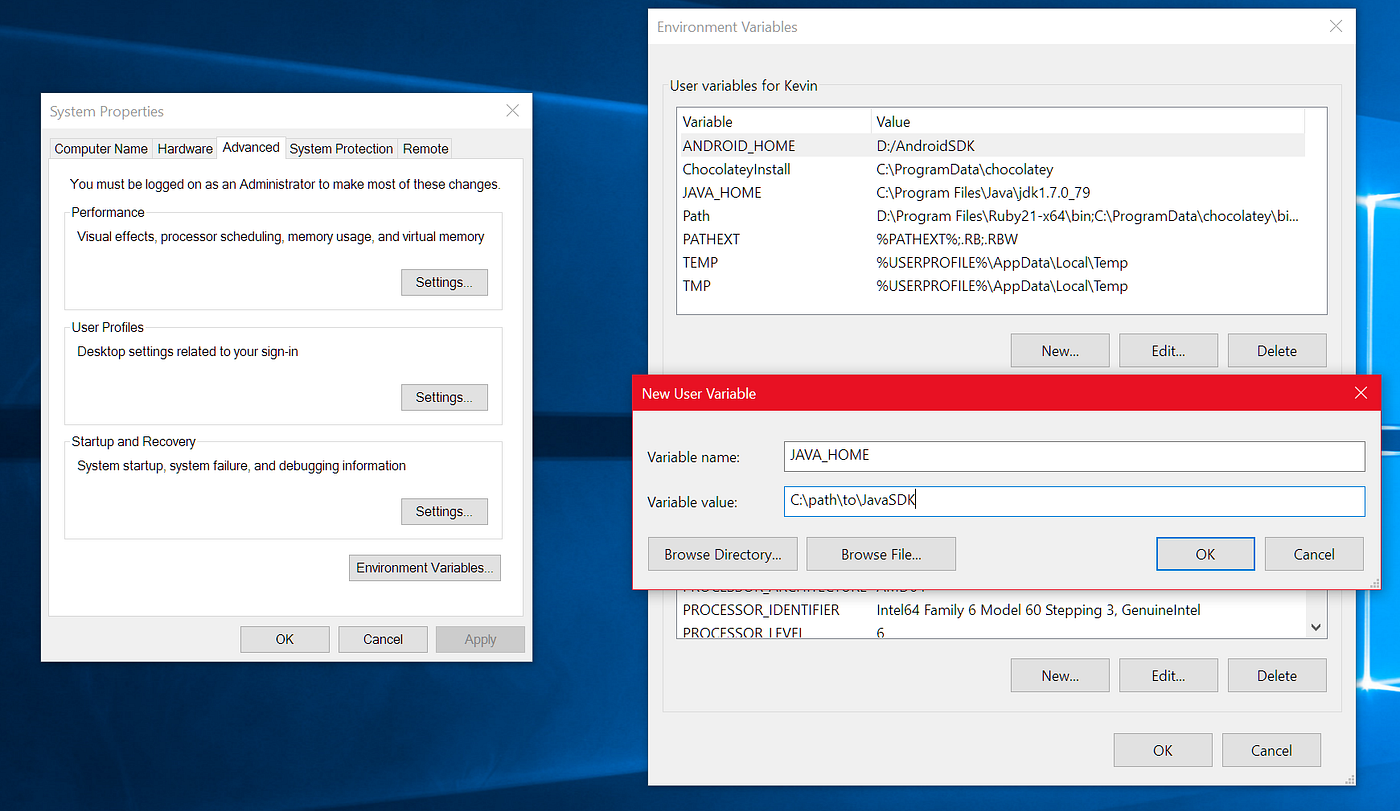
- Due to a custom Android SDK installation location I also had to set an extra environment variable:
ANDROID_HOME: C:\path\to\AndroidSDKStep 2: Configure an Android Virtual Device
- Set up Android Studio
- Create an empty Android Studio project
- Create an Android Virtual Device: Manage AVD → Create
- Boot your Android Virtual Device
Step 3: Jump into Command Line
- Open command prompt, jump into bash, and navigate to where you want your project to live
bash
cd /path/to/code- Install React Native globally:
npm install -g react-native-cli
- Create a new React Native project (Note: this step may take a while):
react-native init AwesomeProject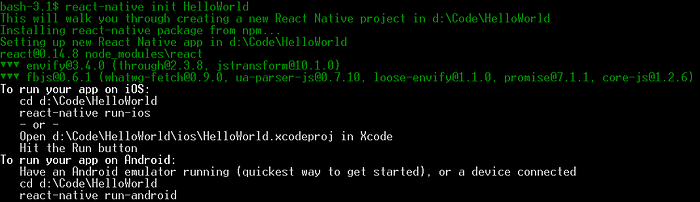
- CD into your new project
- Optional: Configure Gradle Daemon for faster compiling:
((if not exist “%USERPROFILE%/.gradle” mkdir “%USERPROFILE%/.gradle”) && (echo org.gradle.daemon=true >> “%USERPROFILE%/.gradle/gradle.properties”))- Change your android/app/build.gradle file to use your installed version of Android SDK (I had to change mine from 23.0.1 to 23.0.3)
- Start your application
react-native run-android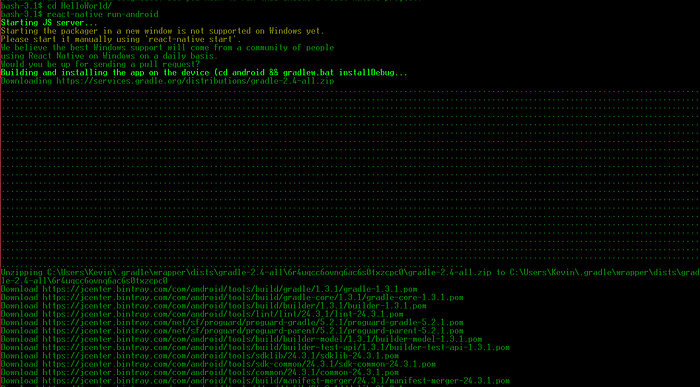
- Manually start the packager (doesn’t currently start automatically on Windows, but probably will at some point in the future)
react-native start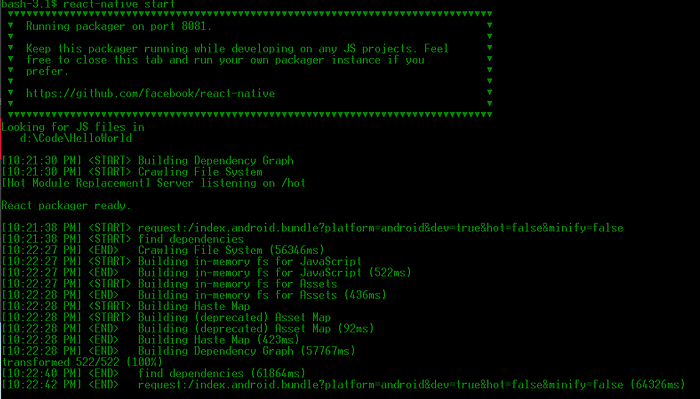
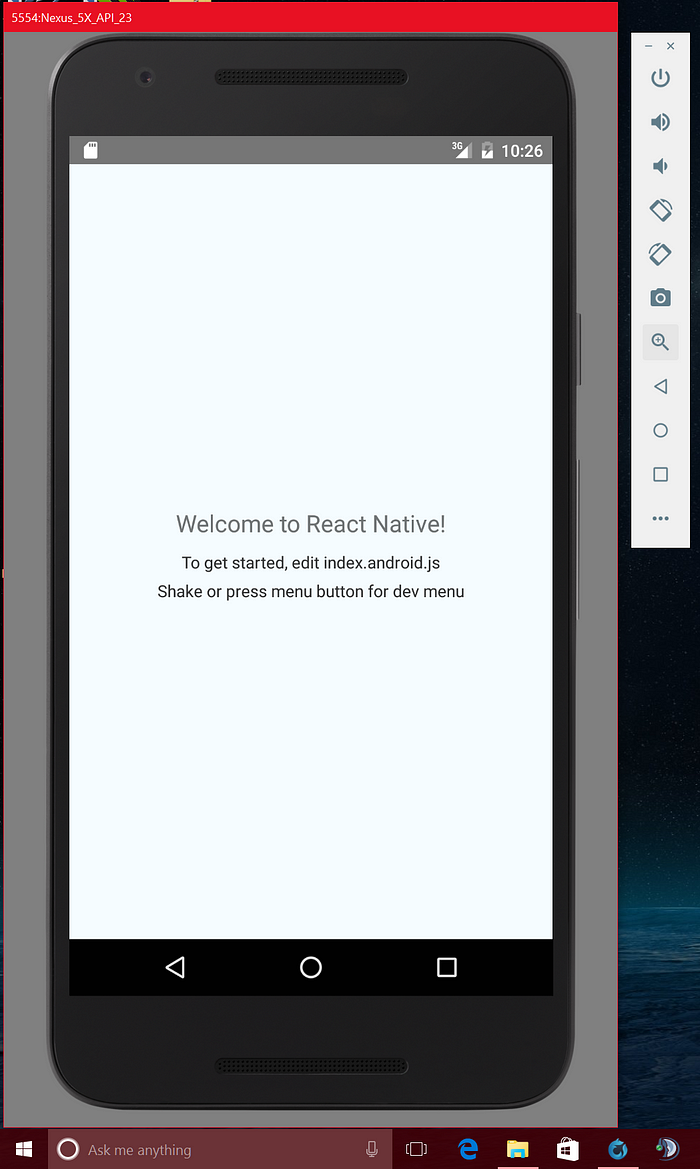
Profit!
As React Native becomes more popular, and the recently announced Windows support begins to come online, the setup process is likely to become more streamlined. In the meantime, hopefully this is enough to get you up and running! Stay tuned for a future article detailing the setup process for running your React Native project as a Windows application.
About Kevin
Kevin is a Software Engineer at Infinite Red (web and mobile app development), Microsoft fan-boy, tinkerer, open-source contributor, and student helicopter pilot. Read the writings of Kevin and his co-workers in our Red Shift publication.