Handling 64-bit Android Builds for React Native

This post assumes you’ve already upgraded React Native in your app to ≥ 0.59.8
If not, a lot of posts recommend rn-diff-purge for reference when upgrading React Native projects that are before 0.59. It’s great, but I prefer to use the Upgrade Helper, because it allows me to select my current and target React Native versions and allows for checking-off/collapsing the diff once you’ve updated the files to maintain sanity. 😜
Having worked in React Native for the last 4 years, we at Infinite Red have gone through many upgrades of React Native in that time and some were more troublesome than others. A few of our client projects have been on React Native 0.54.x and with the necessary Android requirement of including a 64-bit app version with all apps in the Play Store (as of August 1, 2019), we’re having to upgrade those projects as clients want to release new features/upgrades to their apps and/or stay current with React Native versions to take advantage of its recent upgrades.
This article is meant to serve as a reference for uploading a 64-bit compliant app to the Play Store.
Here’s what this post will include:
- How to enroll in App Signing by Google Play
- How to build your app using the new Android App Bundle
- How to check that your Android App Bundle includes the 64-bit version
Enroll in App Signing by Google Play
If you haven’t heard, Android has created a new preferred publishing format for app builds called the Android App Bundle. I’ll let Google tell you about it:
The Android App Bundle is Android’s new, official publishing format that offers a more efficient way to build and release your app. The Android App Bundle lets you more easily deliver a great experience in a smaller app size, which can improve install success and reduce uninstalls. It’s easy to switch. You don’t need to refactor your code to start benefiting from a smaller app. And once you’ve switched, you’ll benefit from modular app development and customizable feature delivery.
So with that said, in this post we’re going to use the new App Bundle format to bundle our app and upload it to the Google Play Console.
Before we can begin bundling our app with the new format, we’re going to need to setup a few things in the Play Console:
- You’ll need to enroll in app signing by Google Play.
- Sign in to the Play Console
- Select your App or Create a New App
- Go to App Signing
- Choose “Upload a key exported from Android Studio”

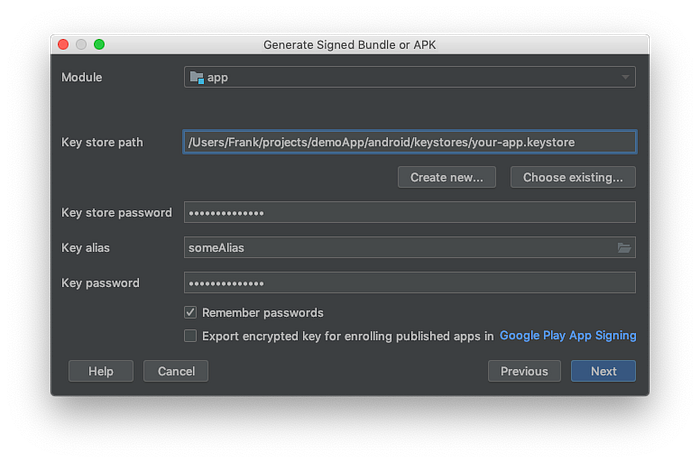
You can follow the Play Store’s instructions to generate the app signing private key Build > Generate Signed Bundle/APK, which should open this dialog:
For whatever reason you might not have or know the password to the keystore… no worries!
Here’s what I had to do to get my password:
cd android/.gradle/5.4.1/executionHistory
then find the password with:
strings executionHistory.bin | grep storePassword -A1
You should see output like:
signingConfig.storePassword
password
--
signingConfig.storePassword
theActualPassword
--
signingConfig.storePassword
theActualPassword
That should allow you to create an app signing private key and upload it to the Play Store!
Note: Google recommends creating a new upload key. You can get the steps to do that by expanding the view below the button.

Now that we’re done with the paperwork, let’s create an Android App Bundle.
1) Bump the build numbers
- In
android/app/build.gradlefindversionCodeandversionName:
versionCode 1 // bump to 2 <-- versionCode must be increased
versionName "1.0" // to "1.0.1" or whatever you want, not required
2) Remove index.android.bundle
rm android/app/src/main/assets/index.android.bundleYou’ll either have an index.android.bundle that will be removed or you’ll get an error that the file doesn’t exist — no worries here.
If you don’t have an
/assetsfolder inandroid/app/src/mainrun:
mkdir android/app/src/main/assets
3) react-native bundle your project (all one command):
react-native bundle --platform android --dev false --entry-file index.js --bundle-output android/app/src/main/assets/index.android.bundle --assets-dest android/app/src/main/res4) Clean and bundle the project
- Note the
bundleReleaseand NOTassembleRelease
cd android./gradlew clean && ./gradlew bundleRelease
This will produce an Android App Bundle at:
android/app/build/outputs/bundle/release/app.aab

Note: If by some chance you get an error that says Error: Duplicate Resources, you might need to delete the drawable folders in android/app/src/main/res and repeat step 4.
Making Sure You Have a 64-bit Version Included in the Bundle (Optional)
If you’ve upgraded properly, you shouldn’t need to check that the 64-bit version of your app is included in your bundle, but rather than upload it to the Play Console and get an Error message, you can check that your bundle includes the 64-bit build in one of two ways:
- From the Command Line
- In Android Studio
1) From the Command Line
zipinfo -1 android/app/build/outputs/bundle/release/app.aab | grep \.so$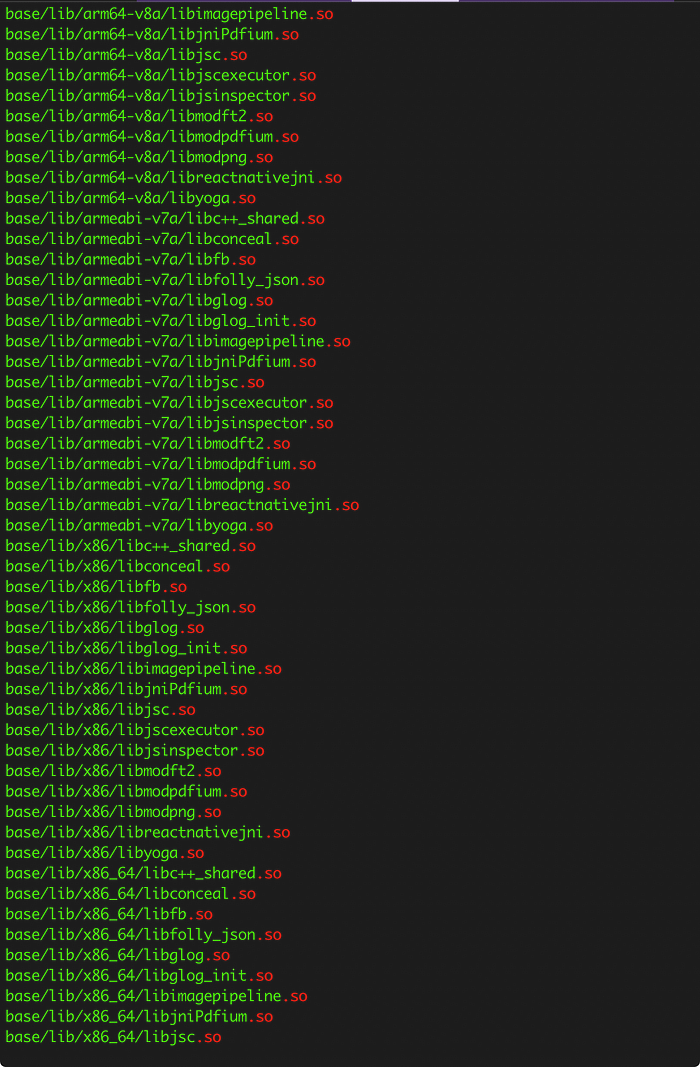
In the output you should see 2 folders in base/lib:
arm64-v8a & x86_64
2) Using the APK Analyzer in Android Studio
In Android Studio go to: Build > Analyze APK
Then choose the Android bundle to analyze, it should be located atandroid/app/build/outputs/bundle/release/app.aab
A side panel will open up and display the contents of the bundle.
Check that the following folders are included at build/lib:
arm64-v8a & x86_64
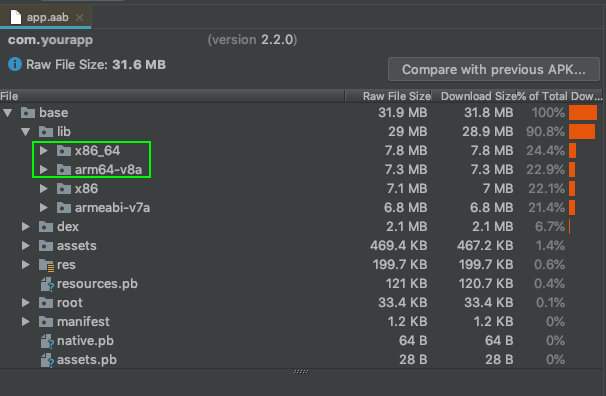
/arm64-v8a & /x86_64 are included in this bundle 👍Conclusion
Now you should have an Android App Bundle containing both 32-bit and 64-bit compliant app versions to upload to the Play Store! Just drag and drop your app.aab file to the Open, Closed, Production, or Internal Test track, fill out the changelog and release it. I hope you found this post useful, I know I will return to it as a reference and that’s what I hope you’ll do too. While you’re here, check out the React Native Newsletter and subscribe to get posts, modules, videos, and much more and all focused on React Native. Until next time… 👋.
About Frank
Frank von Hoven III is a Senior Software Engineer at Infinite Red, specializing in React Native mobile development, an instructor with Infinite Red Academy, and the Editor-in-Chief of The React Native Newsletter. Follow him on Twitter for React Native insights and funny gifs and thoughts.

Some other posts from Infinite Red about React Native: