Instant React Native ListViews
Use Ignite to Generate ListViews on Demand
SPECIAL UPDATE: Do you want to use FlatList or SectionList instead? Ignite support for these VirtualizedLists are available, too! Though this blog reviews the logic behind the classic ListView, the basics are available in Ignite for generating any kind of list.
Now, back to the original blog post:
Why ListViews?

ListViews are a fundamental part of apps. I’ve been asked, and yes, you could just bypass ListViews by using a ScrollView, but then you forgo the optimizations ListViews afford. Whenever you can use a ListView, do yourself a favor, and use it!
Keep in mind, each component you load pulls from a limited set of resources, whether it be network, animation frames, or processing — the ListView helps you optimize and lazy load components.
ListViews in this post:
First: We’ll generate a ListView (⚡ BOOM EASY⚡)
Second: We’ll review how to modify the generated React Native ListView.
Let’s Get Crackin’! Queue the Cheesy Graphic!

This is the easy part. Using the Ignite generator you get to choose between a Row or Grid view.
$ ignite generate listview ScreenNameHere
Two files are generated, one for the actual ListView and one for the styles.
For those of you who’ve had to natively handle a Grid or CollectionView, you’ll appreciate that the only difference when you choose `Row List` vs `Grid List` is contained in the stylesheet!
Now your ListView has arrived! But what did the generator make? Let’s ask the obvious question:

Your generated views are a template with steps conveniently marked out. ListView template comes with 4 well-documented steps inside.
Step 1: The Data for the ListView
Load this however you want. We just need something to display. The objects are obvious placeholders.

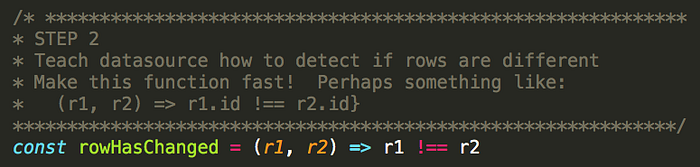
Step 2: Define difference
This is just a function that tells ListView how to understand differences.
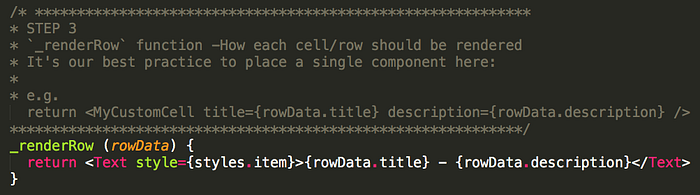
Step 3: Digest your own data
When you get passed your object, what will you do with it? By default the template code just throws it in a Text. You should create a custom component here. Do you think the generator should create a component for you by default? We’d love to hear your feedback! Tweet me!
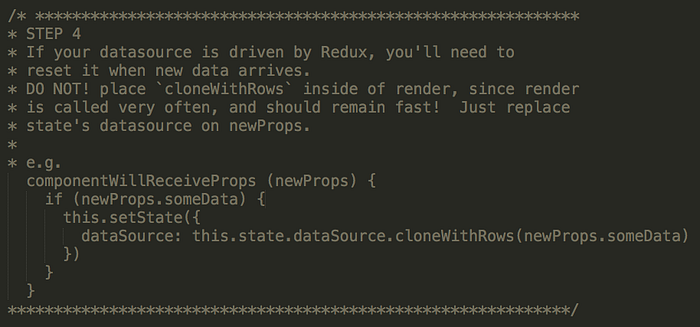
Step 4: Optional — Update when props update
If you’re using Redux, you’ll need to update your datasource when new props come in.
Easy enough! I’ll keep this blog post updated if anything big changes, so bookmark it! Oh and please spread the word with a tweet and star on Github if you like where we’re going.

About Gant
Gant Laborde is Technical Lead at Infinite Red (⚙ web and mobile app dev ⚙), published author, public speaker, and mad-scientist in training. Read the writings of Gant and his co-workers in our Red Shift publication. If you’re looking to discuss nerdy tech, he’s all ears. View half-witty half-groan technical tweets with @GantLaborde on twitter.