Prototyping a Chat App with React Native and Phoenix

Check out this github repo for the accompanying sample code. It shows you how to use websockets to communicate from React Native (iOS and Android) with a Phoenix-based server.
The Proof of Concept Project
Two weeks ago at Infinite Red, we had a client who wanted a proof of concept built.
With a modest budget and aggressive timeline, they had a few requirements:
- Build some screens so we can use them in real life.
- Show us how a React Native app is built so our team can continue on afterwards.
- Dig deeper into WebSockets because one core feature is chat.
Our team is heavily invested into Elixir and Phoenix (which speaks WebSockets fluently), but I spend most of my time on mobile dev. Since they’ve been raving about Phoenix, I thought: what a great opportunity to get my feet wet.
What is Phoenix?

Phoenix is a framework for building modern, web-based, server-side applications.
Included with Phoenix are some client libraries to plug in to the apps you write. For React Native we have these options:
I’d prefer straight-up JS which saves the overhead of writing 2 platform-specific wrappers. Platform components are probably faster, but chat is mostly about waiting on IO and not CPU.
Since the JS version worked fine in React Native, I didn’t end up exploring the platform specific client libraries.
Onward.
Running a Server
For this project, we didn’t have the budget to write a chat server. So I had to find one.
Luckily, Chris McCord (of Phoenix fame) wrote a sample chat server that does exactly what we needed for our prototype. I was able to clone it, and fire it up locally.
For our needs, his code worked right out of the box!
Using the Phoenix JS Client
The gist is this:
- Open a socket (to a server)
- Open a channel (to a room) and join it.
- Listen for and send messages.
Now for some code.
First, you bring in the Socket from the Phoenix.js client.
import { Socket } from './Phoenix'Here’s some hard-coded constants for context.
const user = 'AnonymousCoward'
const body = 'I got something to say.'
const timeout = 10000
const url = 'http://localhost:4000/socket'
Create a Socket, register some event handlers, and then connect().
const socket = new Socket(url, {})
socket.onOpen(event => console.log('Connected.'))
socket.onError(event => console.log('Cannot connect.'))
socket.onClose(event => console.log('Goodbye.'))
socket.connect({})
Create a Channel, then join it.
const chan = socket.channel('rooms:lobby', { user })// join the channel and listen for admittance
chan.join()
  .receive('ignore', () => console.log('Access denied.'))
  .receive('ok', () => console.log('Access granted.'))
  .receive('timeout', () => console.log('Must be MongoDB.'))// channel-level event handlers
chan.onError(event => console.log('Channel blew up.'))
chan.onClose(event => console.log('Channel closed.'))
To receive events, hook handlers up to messages with the on() function. Here you can see us listening to 2 different types of inbound messages. When you start building your app, these messages will be custom ‘types’.
chan.on('new:msg', msg => console.log({ incoming: msg }))
chan.on('user:entered', msg => console.log({ aWildUserAppears: msg }))
To send a message, you push() it real good. Chaining receive() functions after push shows you the status of the push.
// push a message to the server
chan.push('new:msg', { body, user }, timeout)
  .receive('ok', (msg) => console.log('sent'))
  .receive('error', (reasons) => console.log('flop', reasons))
  .receive('timeout', () => console.log('slow much?'))
To close the socket, you disconnect().
socket.disconnect()User Interface
I’m not going to lie to you. This part really felt like I was cheating.
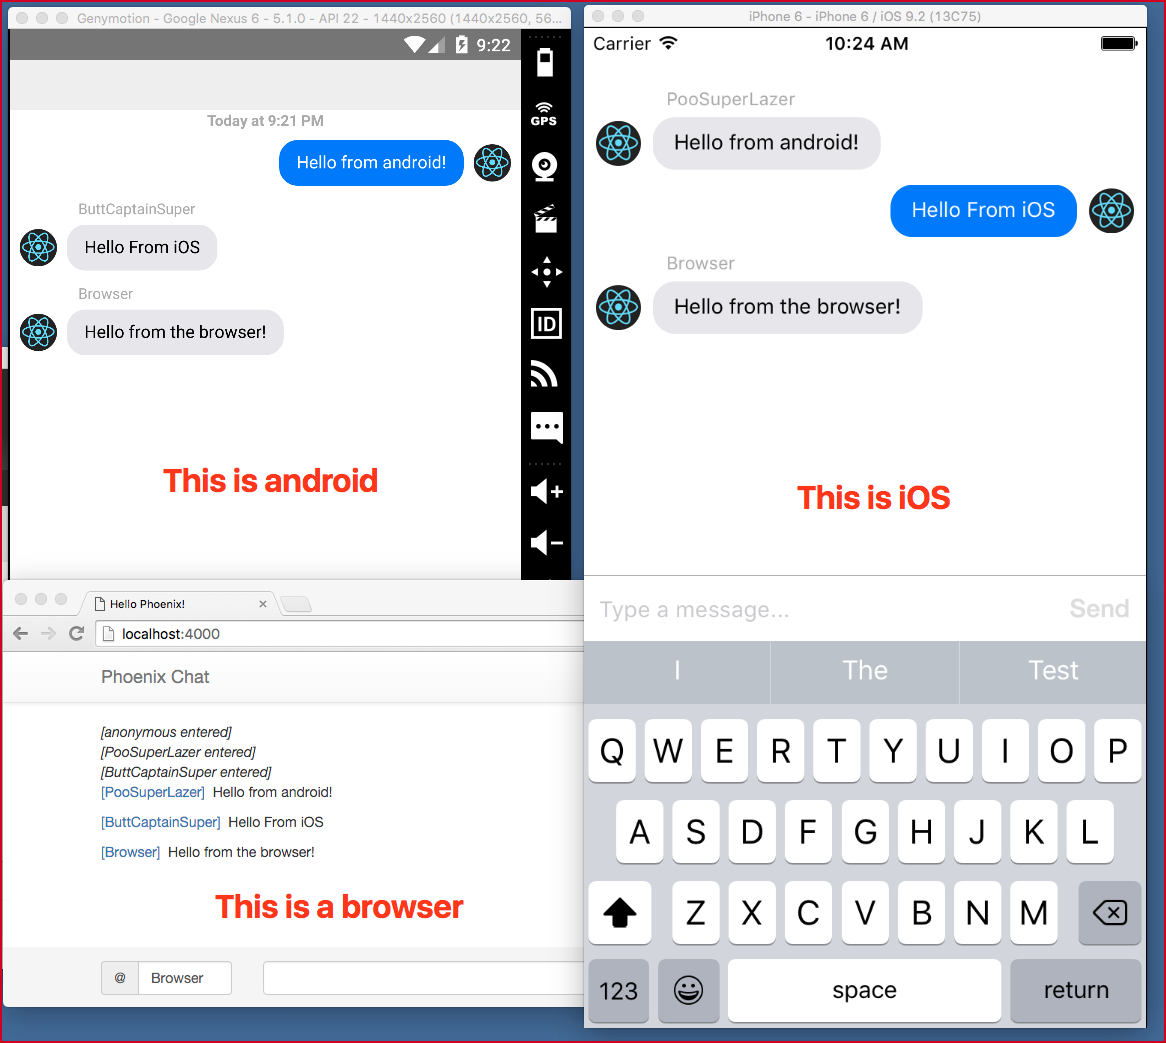
I ended using a great third party component called Gifted Messenger. It supports both iOS and Android. Our client only wanted iOS, but everybody thinks that at the start. :)
There were a few issues with layouts (on Android, the keyboard is cut off and leaving off images doesn’t align properly with names), but I have to say, what a fantastic component! Farid from Safi, merci bien.
Gifted Messenger provides hooks to handle sending and receiving into the code we wrote in the previous section; after all, Gifted Messenger is simply a user interface. You can find code like this in their example.
What This Article Skipped
As you saw in the code, there are lots of event handlers, and a real program needs to handle and recover from errors, failures, and disconnects. Should our client decide to have us help build the real product, we’ll be spending some time hardening that up.
A socket can talk to multiple channels and we can leave/enter them without disconnecting. It isn’t a 1:1 socket-to-channel relationship like this code will have you believe.
I haven’t investigated how putting the app in the background affects things. I would imagine we’d just need to reconnect the socket and re-establish the channels, but I’ve not yet explored that.
Where To Boldly Go Next?
WebSockets need not only be about chat. It’s about realtime messaging and Phoenix is undoubtedly the most exciting tech in this area today. And it plays well with React Native.
Both Jamon Holmgren’s article and Ken Miller’s article explain why Phoenix comes at the right time for many of us. When you’re ready to learn a bit more, Daniel Berkompas has some fantastic courses on learning Elixir and soon Phoenix.
Hope this was helpful. Click the ❤ below if you liked this and aren’t too sick of Valentine’s day yet. I’m @skellock on Twitter if you’d like to… chat.